Using Multi Effects Units For Your Guitar Playing

20131021140024eddieFor this article a few high lights about using multi effect guitar units. I will not provide a shopping list for which unit to get or what is the best available processor around. Will mention some of my own experience with regards to multi effect units.

The first popular multi effects started to appear during the mid  1980s, the early ones used to be large in comparison to most of today’s units. Once the first multi effectors came out people ditched their compact pedals. Who will ever need them again eh? Well by the early 90s things changed again, and single compact effects were back and today we live in a world where guitarists use whatever they like.

What is there to like about a multi effect processor? Why is a good idea to use one? What about their sound compared to a single compact pedal? Are they easy to use?
All very good questions and there is a lot to say about each question. Most of the answers will depend on whatever unit you use as they all differ in sound and how easy they are to use.

Most beginning guitarists today will get introduced to effects by their guitar amps: Most of today’s amps do come with a handful of effects. These effects are often limited in tweak ability, they are good to give you and idea of what a particular effect will sound like. A multi effector can be viewed in a similar way: They are a great way to access many different effects coming all from one unit. They will give you an idea what each effect will sound like and how you can combine certain effects to create a unique sound.

Okay let us have a closer look at a typical multi-effector: Most of them will come with pre set sounds and the ability to modify- and store any of those pre set sounds. When you go through some of the sounds you will find that some of those sounds are really over the top: Impressive to hear but not really usable to play with. You will also find some signature sounds of well-known guitar players. Again, most of those sounds you will recognise, but they may not be that usable for your own playing.

When you analyse the individual sounds from any of the pre set sounds you will find  that most of those sounds are created out of a combination of effects. This is a typical for multi effectors as they get their sound from the combination of certain effects. Try to modify one effect and you will often find out that you will need to add other effects to this single effect to get a good, usable sound.
All in all this is good, as it shows you how sounds are being created.

How good are the sounds in multi-effectors compared to single compact pedals? Maybe you should not ask. One of the reasons to use multi effectors is to be able to create unique, individual sounds which you may not be able to get from a single compact guitar effects pedal.
If you are really fond of delay sounds it may still be easier to get a single delay unit and get your sounds from there. View a multi effector as a sound generator rather than something you use for one particular sound.

Over the years multi effectors have become easier to use. Some of the Boss ones feel almost like you are using a handful of their single compact pedals in sound and ease. Very good and impressive indeed.

A big advantage of why to use a multi effector must be to have a lot of sounds available from one unit: Very useful for gigs and studio work. It saves time patching around pedals and you can also store your own, individual sounds. Out of all the sounds you get you may have about 10 sounds you really like, and those 10 may be very usable for your own playing.

Once you use a multi effector, why not combine some of the sounds with any of the single compact pedals you already use in your set-up? This will give you even more power to tweak your own sounds.

Once you have created a few, unique sounds do not use these sounds all the time as they will loose their uniqueness. Use the sounds from time to time to keep things fresh.

Enjoy your sound adventures and hope to see you soon again for more updates,
Eddie

Using Loops in Your Guitar Playing

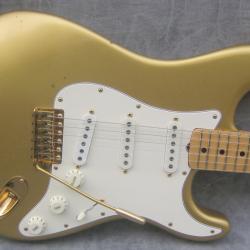
201102211103091982_Fender_Stratocaster_Gold_CA_10667_frontLoops are little parts of music which repeat themselves over and over again. The idea of using loops in music is not new: The Beatles used a few songs where they started to explore loops. Loops started to appear since the early days of recorded music. There have always been musicians and composers around who explored  and pushed the boundaries of recording technology.
Today there are many musical devices around which can help you with the creation of loops. For this article a few high lights of some of the things you can do with them.

Those of you who are new to playing with loops may think about loops as “backing tracks” Basically a backing for whatever song you want to play. Using loops in this way will let you play an extra part over the loops, or you can improvise freely over the loop.

Once you get  the hang of backing tracks you may want to look for more: What about using the loop in a creative way? Use the loop to play music which is only possible by using the loop.

You can create a short loop, and reloop this idea on another loop which could be longer, you can now layer onto the longer loop to create a bigger piece of music.

When you are shopping for a looping device, look at how you want to use the loop. Do you want to use backing tracks? You may need something with a longer looping time. For most creative looping you will not need long looping time, something like 5 to 15 min. may be long enough.  You still want to be able to play over the loop, the more you put onto your loop the less space there is for you to play over!

Once you get started you will discover other ways how to use the loop, just keep at it and enjoy what you can do.

Good luck and hope to catch you soon again.
Eddie

Use Your Own Playing as a Guide to Improve Your Guitar Technique

20131228140041IMG_2980For this article a few tips how you can use your own guitar playing to get feedback on your own playing, how you can use what you already like playing to improve your style and your technique.

Are you one of those guitar players who like to mess around with their guitar? Create your own little melodies and chord sequences or sounds? Are you at times unhappy how those ideas sound? Do they sound sloppy at times? Does the rhythm of your playing not always match your ideas? Do you know how to correct it?

As you can see there are too many things to improve, logical as playing music and playing the guitar combines many skills and techniques together to create the sound you like. To get good at all of them you need to play and work on all those skills  individually. The questions students often ask is: “On what should I start working?”  “What is the most important thing to do well?” My answer is: “Look at your own playing and observe all what is weak, break this down into small segments and work on it”

Let me break down the previous statement into a practical example:  A student wants to improvise over a chord sequence using single notes.  Student is not aware of what the chords are and cannot play the rhythm of those chords.  It may be good for the student first to get to grips with those chords, get them to play smoothly and be able to name the chords as well. Once you understand a chord sequence it will be easier to improvise over this chord sequence since you understand the rhythm and all what lies underneath the chords.

Once the student starts working with those chords, student may feel that fingers cannot grip those chords clean, again this is feedback on the strength of your fingers. You could break that down to working on the strength of individual fingers to improve your overall playing.

When you work on technique individually you will be able to monitor how well you are doing: By sticking to particular exercises you will notice how your fingers will get stronger and this will benefit your overall playing for chords and single strings.

Learning from your own musical ideas is a good idea to improve your own playing: Only you play certain riffs and melodic ideas the way you do. All you need to do is observe how well you play those ideas, do they sound smooth? No? Fingers causing problems or is it music such as rhythm? Break down what it is you do not do well and work on it.

It is possible to get ideas to improve your technique from other people, but the ideas they may pass on to you may not be what you need for your own playing.

If you cannot analyse on your own what it is you need to improve your playing ask someone else to listen to your playing. This could be another musician or guitar player, but it could also be anyone who loves music and can tell you what is not right with your music. All you need is someone who can be objective and honest and give you and idea what is going on in your playing.

Once you know what your guitar playing needs you can then seek professional help or search on your own for the guidance your guitar playing needs.

Good luck and hope to catch you later on for some more ideas how to improve your guitar style.
Eddie

Learning to Play Guitar By Ear

20140306181828IMG_5336For this article a handful of ideas of what you can do to learn to play guitar by ear. Playing by ear is simply playing whatever you can hear or sing.
Learning to play the guitar is about learning to play music, music is a language and most people learn to speak by imitating sounds. You can use a similar approach when it comes to playing the guitar: Simply play whatever you hear. Simple or………….??
It is but the big difference with learning to speak is that we speak with our mouth, to make sounds with our mouth we do not think about what to do, we just utter the words, or sounds and there we go. When it comes to the guitar, there are these six strings,  you can play them with any finger, you can use a plectrum or your fingers and……………you see what I mean.
Most adults in a learning situation will ask questions like: “What finger do I need to use to play this?” Children usually are better, they just play however they can and what feels good for them.

When it comes to playing by ear it is a good idea to also read a little about how to use your fingers or plectrum, also get informed about the instrument, the names of the strings etc. Do not get too seriously wrapped up in all the technical jargon, just be playful. Use this approach to your playing as well.

For those who really will take things seriously, books can help you, also taking up guitar lessons with a tutor ( or sit down with someone who can play and does have patience, time and is willing to show you the first steps).

Playing without any sheets or books feels natural, and it is something you should try to achieve, even if you can already play, but most of your playing may be at the moment from sheets or books.

Playing by ear can be used in the learning process during the first stages, once you get more experienced you can  go and look into particular techniques and topics of playing. Books may be useful as a source to inform you with, after you have internalised the information you can still play some of the material by ear as it will feel more natural.

Keep at it and enjoy your learning process and hope to catch you soon again.
Eddie

Using Compressor to achieve Overdrive from Your Guitar Amp

For this article a few tips on how you can use  a compressor to push your amp to create overdriven-and distorted sounds. Most of these ideas will work well with amps which do have a gain-and master volume stage. Amps which have only one volume control may not give you the same results, just try to see how your amps responds to the compressor.

Compressors can be used to sustain notes, to add a bit of brightness to your amp and to add more volume to your overall sound. Compressors are also able to excite the overdrive stage of your amp quicker, since they can add more volume to your guitar amp. Using a compressor in this manner may give you a more subtle kind of overdrive instead of the full-tilt overdrive you may get at the moment.
To achieve this sound, basically set your pre-amp (or gain) level just before it kicks in, your sound should still be clean when you play. Now set the compressor up to add more volume, adjust the amount of compression, you do not want too much compression as we are after volume instead of more compression.
Adding a Equalizer to the mix can bring out more treble and may make the sound more realistic. Be careful with how much you boost on the Equalizer, you only want a little bit more treble and maybe bass, depending on your amp. You may even want to put the Equalizer in the loop of your amp, leave the compressor at the front end of your amp, as it will work better at that end.

Compare the sound you are getting using the compressor to your regular kind of distorted (or overdriven) sound. At first you may not feel there is much difference, but it may be just because you may not be used to using the compressor in this way.

Good luck and hope to catch you soon again for more.
Eddie

Guitar Lesson: Getting Into Playing Finger Style Guitar

For this article a few highlights and comments about finger style guitar, how it is being used and how you can apply it to your own playing style.

I use the term “Finger Style” here in a general way, read it for anything you can play using your fingers instead of a plectrum.

  Alternating Thumb and First Finger of Picking Hand:

Technique is a wonderful thing, it will help your fingers to play anything you want, but for this to happen your technique needs to be solid and grounded on a few basic principles for it not to let your playing down. A solid technique can be acquired through a lot of playing and consistency in your playing. Assuming that your plectrum technique is in place, let us take a same approach with finger style as what you already do with the plectrum: Play alternate picking style using your thumb and first finger. This idea will work very well for single string ideas such as melodies, riffs and licks. Go slow in the beginning, just play thumb for any note which is on the beat and for the off beat use your first finger. You can also use thumb all the way through for most ideas which are being played on the low E, A and D string.
Try just using thumb, then alternate between thumb and first finger. Try to be as precise as you can and set up a rule for yourself where you can come back to. After a while this method will become second nature and you will be able to play using your fingers in this way without thinking, similar as to how you use the plectrum now.

More Advanced Ways to Play Finger Style:

The alternating style between thumb and first finger is an easy way to grasp how to play finger style. There are many different ways to execute your melodic ideas using your fingers. A good way to introduce you to various ways of finger style is to look at some tutor books which deal with Folk style guitar playing, or Classical style. The advantage of using tutor books is that your reading skills will improve at the same time as well.

  Guitar Tone and Finger Style:

Using finger style will give you a different tone, for some it may sound more mellow or smooth, but your playing can sound smooth using a plectrum as well. Once you are used to plectrum- and finger style you have a choice over which technique to use. The music you play should decide on what sounds best.

For later blogs I will create a few examples which will demonstrate various ways how to use your fingers.
Stay tuned and hope to catch you soon again,
Eddie

What Makes Up the Sound of Your Electric Guitar?

20140131140444IMG_3946The sound of the electric guitar is made up by all the different parts of the guitar. The most important part may be the pick ups, but all parts of the guitar work together to create its sound. For this article a quick overview of what all the various parts do for the sound of the guitar.

Fretboard:
Fretboards come either in Maple or Rosewood, Maple looks lighter compared to Rosewood. Maple is actually harder than Rosewood. Untreated Maple may get dirty over time from being used.  Have a look at some older Fender guitars to see what this looks like. Most guitar players will think about their fretboard as something which creates the feel of their guitar rather than the sound of their instrument.

Body:
The body can be made out of one piece of wood or several pieces of wood. A guitarbody made out of one piece of wood will resonate better compared to a body made out of several pieces of wood.
The thickness and density of the wood also makes up for the sound: Wood absorbs the sound of the strings and denser woods may absorb less, but denser wood may add more depth to the sound. Thinner guitar bodies will add less depth to the guitar and will give you a thinner sound.

Bridge:
Is the bridge a floating one or a fixed bridge like Les Paul type of guitars have? Floating bridges do have less contact with the body, therefor make up for a different sound. Fixed bridge guitars do have a more direct sound, the body can react quicker with the sound of the string which makes up for a different sound.

Strings:
Are you using a thin or thicker gauge of strings? Thin strings will add more twang and ring to your sound. If you are playing mainly chords you may like this sound, for playing single strings you may want a bit more body, thicker strings would be better for that kind of idea.

Pick Ups:
Probably the most obvious part people will associate with the sound of their electric guitar. There are Humbuck and Single Coil pick ups. Gibson guitars tend to use Humbuck pick ups while Fender type of guitars tend to use Single Coil pick ups. Single Coil pick-ups do give a brighter sound while Humbuck pick-ups will give you a fuller and thicker sound. Some guitars combine both type of pick-ups. It may be possible to customize your guitar for using both Humbuck- and Single Coil pick ups.

Nut:
The nut can be made out of bone, plastic, brass or metal. All these different type of materials will do something for your sound. In the 70s and early 80s some guitars builders favoured to use brass as it was believed it would add to the sustain of the sound. Different kind of ideas are being used at different times. Tastes of guitar players also change over time.

Can you actually hear any of what I have mentioned above? Experienced players will hear the differences, and most people will be able to tell the difference once they have been explained what to listen out for when comparing a few different type of guitars.
What is the best you may wonder? There is no such thing, it is all about taste and what you want from your guitar. It is probably why most guitar players end up with various guitars which will suit for different playing situations.
Experiment with customizing any of you guitars may be fun: Start out with changing one part such as a pick up to see what the result is for your sound. Once you have changed one part you can carry on by changing anything else to see how it affects the sound. By doing this you may end up with a guitar you really like (or dislike…)  It is always a gamble but by changing one part at a time you get to see what the effect of the change does to your sound.

Have Fun and hope to see you soon again,
Eddie

Floyd Rose Bridge, Locking Nut and Changing Your Strings

20131215184822eddie 2For this article a few ideas about how to change your strings for guitars using a Floyd Rose bridge and a locking nut.

Most guitar players will cut the ball end of their strings and attach this end of the string to the locking mechanism at the bridge, they will then tune up the string the regular way. This is a good method and works perfectly well. What about when you break a string?

On most Floyd Rose bridges the string tends to break at the bridge, just like with any other type of bridge. The advantage of the Floyd Rose system is: Break a string, and just reattach that same string where it broke off. All you need is a string which is long enough to reach to your bridge. Instead of cutting the ball end of the string keep it there: Thread the string through tuning post with ball end remaining at the end of tuning post. The clear end of the string is the end you use to attach to the locking mechanism of the bridge. There are a few advantages to this: You do not need a wire cutter to cut of the ball end and you can reuse the string once it breaks. Disadvantage is you have a lot of string left over at the headstock, they can make a bit of a mess. You can wrap them up and stick the remaining bits underneath the strings which come from to tuning peg going to the locking nut.

Most strings tend to break during string bending and whilst using the tremolo bridge, it is just the nature of strings as they loose their flexibility over time. String bending and moving the tremolo bridge up and down does also wear out the strings quicker. Sometimes strings break because there are sharp edges on the nut-or bridge end. These sharp edges appear just as a normal sign of wear and tear from the strings moving over bridge, nut,  frets and fretboard.

Good luck and hope to catch you soon again.
Eddie

Use Preamp for your Acoustic Guitar

20131107154301eddieA typical situation to amplify an acoustic guitar is: plug straight into the mixer of the P.A or the amp. For an acoustic guitar  equipped  with a good pick-up this situation will work well. What about if your pick-up is not that good, sounds a bit metallic or……………..?
Instead of plugging straight into the desk or amp you could first plug into a pre-amp. A pre-amp will let you colour your acoustic guitar sound to whatever sound you want. You may want to aim for a natural, acoustic sound, or you may want to achieve a different sound from your acoustic guitar, a sound which may work better in a setting of drums and bass. Whatever sound you want you can probably get if with the help of a pre-amp.
Acoustic guitars which do have a build-in preamp may not need any of this, but if you are not happy with your sound than look into using an outboard pre-amp.
As for what kind of pre-amp to use, there are a lot of them available: There are dedicated acoustic guitar pre-amps and there are pedals which you can use for other situations as well. I like the Tech 21 Sans Amp range, you can use them for almost anything you want to colour and amplify. Just look into what you need and experiment to see what sounds right for you.

Good luck and hope to see you soon again,
Eddie

Boss AW2 Explained in Plain English

20140329132756IMG_4372For this article a short brief on the Boss AW2 Auto Wah pedal. It is one of the pedals which appears to be not straightforward to get good sounds. Some of controls work in tandem and set them slightly different and you may not get a pleasing sound at all.

The controls work as follows: Rate stands for the speed on the filter: It will give you slow or faster rotating sounds. To get those sounds you will need to open up the Depth control which controls the strength of the Rate control (how well you will hear the rotating sound).
Manual stands for the frequency, on the left you get bass and from the middle onwards the control will give you treble. The Sens control will let you open up the filter, but open it a little and you will already hear a difference in your sound.

Easy Setttings to get you Started 

Open up the Rate and Depth, do not open up the Manual and Sens control.  This setting will give you a filter wah sound. You can set the Rate and Depth at any setting, but you need to open the Depth control up a bit. These controls work in tandem so close the Depth and the Rate control will not give you anything!

Next is the opposite: Leave Rate and Depth closed and open up the Man. and Sens. control. This setting will give you auto wah.
A variation on this sound is: Leave Rate, Depth and Manual controls closed but open up Sens. This setting will give you dynamic auto wah.

Open up only the Manual control while closing all the other three controls will give you Static Wah sounds.

These are just some settings to get you started, experiment for yourself keeping in mind how the controls work to get the best out of the pedal.
One nice sound is to get that rotating sound underneath all your playing: Just use the rate and depth control and play softly with your dynamics, play harder and the rotating sound will kick in when you pause on your notes (or chords).

Enjoy and hope to see you soon again for more.
Eddie