Experimentation and the Growth of Your Guitar Playing: Two Methods To Explore Your Music Making with the Guitar

Experimentation is something which will keep someone’s playing fresh. It is true that some people are more prone to exploring different musical ideas compared to others, but anyone can learn to look at other approaches how to learn to play the guitar, or how to make music. You do not need to be a expert or someone with a lot of experience under their belt. All you need to do is want to grow and become better as a guitar player and a musician.
In this article I will briefly explore two different ways you can use for your music making to add a fresh spark to your own playing.

The Material You Work With/Are Learning at the Moment :

First let us have a look at the material you are learning, or the kind of material you are playing with.

You may have set yourself the goal to become a better improviser and you may have learned a few scales to play in position. Why not learn to play those same scales over one string?
Why one string you may wonder? Because it will teach you how far apart each note is. “Am I playing a half tone apart from the previous note or is this a whole tone above the one I am playing now?”.
The character –tone if you like— of a scale is determined by whole-and half tones. Combining whole-and half tones will create intervals and certain intervals will give each scale its unique tone. Getting to know where those notes are is crucial, and playing them on one string is a simple thing to do. If you have never thought of this, try it now today to experience the difference in how you vision that particular scale.

Another example of the material you are playing with could be the songs you are playing at the moment: Let us say you are playing some cover songs. Why not change the key of the song?, play different chord shapes compared to the ones you are already using.
Why would you do this you may wonder? It will make you think about where to play those chords, it will also make you think about the key of the song. In case you sing with your songs, you will learn how to sing in different keys. It is not all that hard, it just takes a bit of work to get used to playing your songs in different keys. You may find that some keys actually sound better for the songs you are playing. You will only find out by exploring different keys, so give it a go!

The Equipment Your Are Using:

For this section we are looking at the equipment such as guitars, amps and pick-ups of your guitar you could experiment with.

Most musicians at the start of their playing career will not bother with changing amps and guitars constantly. Why should they? If you are new to things you need to first learn how your guitar and your amp sound as they are at the moment. Since this takes time, it is a good idea to stick to your same set-up for a while and just play and learn how things sound the way they are at the moment. You can explore your different amp- and pick-up settings, since they will make a difference to your sound, but no need to get another amp and guitar yet!

When should you get another amp-or guitar? It all depends on how much you play, how good your first guitar and amp are. If they are of good quality you will discover new sounds as your playing progresses. Your hearing will improve and will start to notice what your amp-and guitar are capable of. You will also notice their shortcomings.
The progress of your playing starts with your own skills and equipment will only enhance and inspire your playing. A amazing player will make budget equipment sound fabulous. Keep working at your musical skills all the time!

Before you decide to buy another guitar or amp, ask around what any of your musical friends use. You may even be able to borrow something of them, something you are not familiar with, to broaden your musical horizons.
Today there are many amplifiers available, and most of these amps are very versatile. They may be good at giving you the sounds you like. On the other hand, a versatile amp may not be as good as a amp which will only give you one particular sound.
Today guitar amps have more bells and whistles, which makes them very versatile, compared to the amps of the last fourty/fifty years ago. Exploring different type of amps will give you a better insight into how things work and what works for you as a player.


Most musicians end up using different guitars-and amps because it inspires. One set-up is not good for all kinds of music, it may be good for certain things, so a bit of experimentation helps. Educate yourself on the sounds you like and want to explore and find out what kind of equipment you would need to create those sounds.

The world of sound is as deep as the world of musical technique and music theory. Working with sound is certainly something you will need to get used to if you have never explored any sounds before.

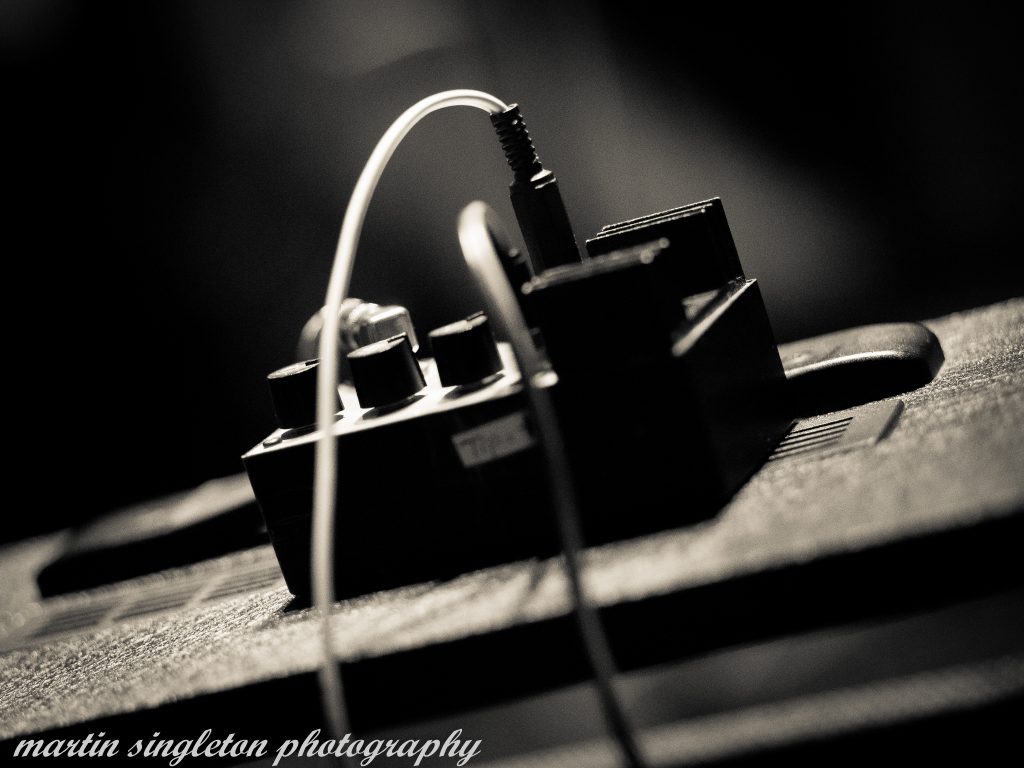
Apart from exploring different kind of amps-and guitars, you can have a look at using effect processors. Using effects makes you think in a different way about songwriting: You can write a whole songs-or musical idea, based on a particular sound. Again, this is something you may never have experienced before, so give it a go if you are interested in your guitar playing and music making.

Next to exploring effect processors you could look at guitar pick-ups: changing them will have a huge impact on your sound. Again, first make sure you really know the sound of your current set of pick-ups before you explore a different set. The sound you want to make is mostly in your hands and head and your choice of pick-ups will only enhance that sound. Make sure your have the technique you need underneath your finger tips before you blame your equipment on the lack of any musical inspiration.

As anyone who reads this, you will realise this list is only a small sample of things you could experiment with in your own guitar playing and music making. Once you will start exploring with whatever you like to explore in your own playing, you will discover other options of how to play the guitar. The options are really infinite and different players will explore different musical avenues, and after all, that is what all this exploring is about—–Finding new, and fresh ways how to make music with the guitar.

Hope you did find this useful and hope to see you again for more musical ideas to play with.
Thanks,
Eddie

Five Ways To Improve Your Rhythm Playing On the Guitar


In this article we will explore five simple methods how to improve your rhythm playing on the guitar. I hope this guide will help you to break down more complex rhythms you may encounter during your playing.

Being able to put across a strong rhythm on the guitar is a necessary skill which will make whatever you play sound much better.
Of course, playing rhythm guitar is not only about strum patterns. It is about understanding what you do in terms of the kind of chords you play, their function, understanding the divisions of the bars in the music, and what you can do yourself to manipulate the rhythm of the song.
This simple guide is here only one part to making you a better musician and guitarist. Try to immerse yourself fully in the songs, or music you want to play with all what it takes and take your time to experience your growth as a complete musician.

# Break Down Rhythm in Down Strums:

Whatever rhythm you play, bring it down to only using down strums, since they are easier to control for less experienced guitar players.
Use the down strums also in places where the rhythm falls on the off beat.
The idea is to get your playing as clean as possible so anyone can hear the feel of the song-or musical idea.
When strums are not clear, the rhythm is obscure and not obvious, therefore, try to be as precise as you can, do not rush it until you have nailed down your strum pattern to a strong grove.

# Regular Strum Pattern Or….?

Once you have your strum pattern in place, ask yourself what is going on: Is the pattern I play here occur over one bar, or over two or more bars? Is it a regular occurring pattern, or does the pattern change somewhere mid song?
All of these questions help you to become more aware of what is going on in the music or song you are playing.

At some point most of the mentioned above will become second nature, and —hopefully— you will be able to make any rhythm changes on the fly of the moment. For now, just take it slow and make sure you understand what is going on with regards to the rhythm of the song.


#Play Strum Pattern Using Up-and Down Strums:

Once you are comfortable with the strum pattern you play, have a look at where the up beats are in the pattern. Once you are aware of your upbeats, play the strum pattern you have been playing before, by using down-and up strums. Use down strums for playing on the beat, use the up strums for playing off the beat. This will result in a smoother execution of the rhythm.

#Clap Rhythm:

Clap the rhythm you want to play by using your hands, or use simple hand percussion such as tambourine or a simple woodblock. Being able to play simple percussion instruments, or even drums, will improve your understanding of rhythm even better.
You may say: “I only want to play a few songs on the guitar” I hear you, but it takes time to get those songs right and whilst you are on your journey you may become aware of how much fun it can be to play some simple percussion instruments. Play the back beat of the song you are working on on a tambourine. Once you start to feel where you place those beats with the tambourine you may be able to play those same beats on the guitar without too much effort. Keep working at it, also count where you actually play. All of this will become second nature after a while, it will also help you to correct errors or get through difficult passages in songs.

#Change Strum Pattern:

Try this idea once you feel you have absorbed all the above, since changing the strum pattern on purpose, will create a change in the rhythm and feel of the song.

Change the strum pattern by creating a pause, a rest, a moment where you do not play, in the music. If you have a strum pattern which occurs on every bar, why not create a two bar strum pattern with some variety, something which may add a bit of excitement to your playing. Once you will start working with some of the above mentioned ideas, you will discover the endless options you have for creating different feels–strum patterns— which will make your songs sound more alive.

Keep working on your playing and keep counting, but have fun at the same time.

Hope to see you soon again for more,
Eddie


Boss Digital Delay Pedals: Guide~ How To Hear Their Difference in Sound?~

For this article a short guide how to check for the differences in sound among the various Boss Delay pedals.

Boss produced the DD-2 as one of their first digital delay pedals, in the early 1980s. Since that time there have been several updates for the same pedal. Each new model does come with new features such Tap-Tempo, Reverse Delay, Warp Sound and more Stereo Delay options. However, the basic sound of the delay has not changed, but each different model does have its own variation of that basic sound.
The variations in sound are easy to notice once one knows what to listen out for.
The differences in sound are due to different chips being used for each new model, and some slight design variations.

The most noticeable differences are:
The Colour of the Delay Sound:
Is the sound light, airy and glassy or is it dark and full?
The Trial-Off of the Repeats:
Are they relatively short or longer?
Strength of Output Signal:
Is it light and lower in volume?, or is the output stronger and louder in volume?

Colour of the Sound:
To compare the colour of the sound use relative long delay time setting of 800mS. for all the different pedals you want to compare. Use the time control to vary the pitch while listening to the differences in sound. Some models will hold the note well and it will remain full in sound, while some other models will loose the note and the overall sound will become weaker when you do this test.

Trail-Off Repeats:
To compare the trail-off of the repeats set the pedals to 800mS. Put the feedback control to where the pedal nearly oscillates. Listen to your different pedals. Make sure you use same settings for each pedal to produce a similar sound in terms of repeats, delay time and output level.

Strength:
To check for this characteristic use 800mS for all the pedals. Get all your different pedals to sound the same in terms of delay time, repeats and output level. This is not as easy as it sounds. Use your ears and own judgement to check. Any variations in delay time will make true comparisons impossible!

Observations:
~~N.B for the DD-3 I used the current model, all my observations are based on this model. If you have any other DD-3 version your findings may vary!~~

DD-2: Glassy sound, weaker output, repeats trail-off are relatively short.
DD-3: Darker sound, more output, repeat trail-off much longer and very natural!
DD-5: Almost as DD-3, less output, pitch play for this model sound very digital due to design issue about direct/effect signal. For overall performance this will not hinder the pedal!
DD-6: Trail-off repeats not as natural as DD-3 and DD-5, Output level much higher as DD-5
DD-7: Better compared to DD-6, not as natural as DD-3

Which of all of those models is the best you may wonder? I cannot tell, I like all of them, they all have their different sound and they are all useful for various musical applications.

There will be two videos which will illustrate what I described above: One will be about a comparison between the DD-2 and DD-3, the other video will be about the DD-2, DD-5, DD-6 and DD-7 and how their different sound can be used musically.

If you have found the information in this article useful why not subscribe to the channel? Please do not forget to like and share video. Thanks!!
Eddie

Improvisation and Loops: 3 Methods to Improve Your Sound

This little amp is inside the amp mentioned in video

For this article a short guide how to improve your sound whilst improvising using loops. I will explain three short, practical tips how to improve the sound of your guitar when you improvise and use loop pedals.

Using Two Amps
One of the first thing to do is to use two amps: One amp is for your loop, the other one is for your improvisation. These two amps will keep your sound clear and uncluttered since each amp does have its own, individual speaker to keep the sound nice and clear.

Using Pedals
Secondly, to diversify your sound use guitar pedals. The pedals of choice are up to you: You may want to alter the level of the sound by using dist/overdrive pedals, or you may want to use Delay pedals. The main goal for using pedals is to create a different sound for the signal of your improvisation compared to the guitar sound of your loop. Combined with two different amps, this approach will give you a huge, wide open and clear guitar sound.

Playing Over One String
(Experienced improvisers may want to ignore this section!)
The third idea is related to keeping your ideas simple and short: Playing over one string at a time gives you the ability to see where you are going on the fretboard. You can actually see the notes you are playing compared to feeling your way around on the fretboard! Once you know what you are after musically you can start playing across the strings and play more in position as opposed to playing along the fretboard.

Here is a simple scale idea for E major Ioanian scale as used in the video, all notes are being played on the B string :
5—7—9—10—12—14—16—17—

The important notes in this scale are the G# (fret 9) and the D# (fret 16):
The G# is the major 3rd, change this note to a G (fret 8) and you are playing a minor 3rd, which creates a different sound within the scale.
The D# is the leading tone to the keynote, in this case the key of E major. Both the Leading Note and the Major 3rd are characteristic for the sound of the Ionian scale.

Check out video which demos the whole process as described before:

Check out image at top of this article, this is the amp build into the enclosure of Fender Frontman amp


Correction Video:
I mentioned E Dorian, it should have been the F# Dorian since it is the 2nd degree of the E Ionian scale.

If you enjoyed the article and video, why not subscribe to the channel? Please do not forget to like and share the video. Thanks!!
I hope you will be able to use some of these ideas for your own style of playing.
See you soon again for more,
Eddie

Adapted Nashville Tuning

For this article a short brief about adapted Nashville tuning. I use the term “adapted” since this string gauge is based on regular Nashville tuning.

Nashville Tuning
Regular Nashville tuning uses the same string pitch as you already use: Standard tuning, but you change your strings to the melody strings of a regular 12-string set. A example of a typical Nashville tuning string set is: (low to high) 0.26, 0.20 (plain), 0.12, 0.09, 0.12, 0.09
Looking at the string gauges you will notice there is only one wound string: The low E, and this string is a lot lower than what you would normally use.

Where is Nashville Tuning Used For?
Why would you use this idea? The sound of your strings is a lot brighter and twangy. Nashville tuning can be used to beef up the sound of guitars on recordings or any ensemble playing. It will add more twang to your chords. Most of your low end has disappeared and your guitar will sound a little like a Mandolin.

Adapted Nashville tuning uses regular string gauge set, the only difference is for your low E and the D string. You can use the same gauges for these strings as what was mentioned above for Nashville tuning: 0.26 and a 0.20 (plain)

No New Tunings or Fingerings are Needed!
You can tune your strings to regular pitch or use altered or any open open tuning you like. All work well for this string alteration.

Unison Tunings
Adapted Nashville is great for unison tunings: Any tuning where you use a set of 2 strings and tune them to the same pitch. Since we have 6 strings you will end up by having 3 sets of a similar pitch. You could simply tune to a triad or any other chord you may like.

When you use the unison tuning you will find you will have a melody- and bass string available for your playing, which is similar as when you would play a regular 12-string guitar.

Adapted Nashville tuning is great for chords, any type of rhythm playing or improvising: Simply use your low E, D or G string as drone note whilst you improvise over the given drone tone.

Try the adapted Nashville tuning for yourself to see if it inspires you to play any new styles of music compared to the styles you are already familiar with.

Check out video underneath for more ideas related to Nashville Tuning


If you have found this article useful why not subscribe to the channel? Please do not forget to like and share the video. Thanks!!
Eddie

Use StringBending for your GuitarPlaying: How to do it? How to Apply it?

For this article a brief explanation what stringbending is all about and how you can apply its sound to your own guitarplaying.

On the guitar you can play chords or single strings. You can play open strings or fretted notes. Fretted notes are being played by fingering a fret on the fretboard with a finger of your left hand. The fretted string will respond directly by making the note heard. When you bend a string the sound is different, less direct, compared to playing a fretted note: The pitch of the fretted note is altered by pushing up the string. The pitch can be bend up one fret, two frets or even half a fret, all depending on on how far you bend the string! Stringbending can give you the idea you are playing with a slide without actually using one!

Which Fingers To Use?
A common technique to bend a string on the guitar is using your ringfinger of your fretting hand. The ringfinger is doing the actual stringpushing while your index-and middle finger support your ringfinger: The actual technique works as follows: Place your ringfinger on a fret somewhere on, for example, the B string. Place index-and middle finger directly behind ringfinger on the same string.
Using this stringbending method you will notice it will give your ringfinger more strenth, power and stability to push the string to create the correct pitch.

Correct Your Pitch
Anyone new to stringbending will experience difficulty bending the string up to the right pitch. A simple way to check your pitch is to bend one fret up from your fingered, fretted, note. After you bend the string, play the actual bended note. This will result in the actual note being played twice: First you will hear your bended version, then the fretted version of the note. If your fretted note is lower compared to the bended note, you know you will need to bend the string a little further to get the correct pitch.

Where on Fretboard?
Stringbending will be easier in higher positions on the fretboard. The fifth position seems to be a common position for most guitar players. The fifth position gives also easy access to the key of A minor, a common key for most Blues and Rock songs. It may be a good place to start when you are new to stringbending.
It is possible to bend on any string of the guitar, anywhere on the fretboard. All you need to do is to work on the strength of your ring finger to bend the strings in various positions. Experiment to see where you like its sound the best.

Which String?
Any string can be bend! Plain strings have more resonance because of their nature: They are thinner and sound brighter compared to wound strings.
Beginners may find stringbending easier on plain strings because they are thinner and have less resistance, but wound strings can certainly be bend too! They will sound different and will take a little more effort, just try it!

Application
Now you know how to bend a string it is time to apply your new technique.
A common way to use stringbending is play a phrase and bend into a particular note of that phrase, instead of fretting this note. This method is used by a lot of Blues guitarplayers. Listening to various players who use stringbending will give you a good idea what is possible.
Is stringbending only used in Blues? No, altering the pitch of your strings can be used in any style of music. It is a technique which is also often used in Eastern styles of music such as Indian music. Basically the technique of stringbending will offer the guitarist a different sound. This sound can be used in any form of guitarplaying, all depending on your own style and taste.

p.s: for the video underneath I use standard D tuning which is (from low to high): D, G, C, F, A and D

Did you enjoy the lesson? Why not subscribe to the channel? Please do not forget to like and share the video. Thanks!!
Eddie

Music Lessons For Guitar, Bass, Ukulele and Keyboards Are Back!!

I am open for music lessons for any of the above mentioned instruments plus songwriting.
During these difficult time some of you may not feel sure with the start up of learning a musical instrument, something which is understandable.
On the other hand, this may be the time to make a start with learning a new skill such as playing the guitar. Music is a friend for life and it can comfort you in difficult situations such as the times we are having right now.

My lessons are flexible in terms of days and times. You can visit me at my house or I can come to yours, depending on what you want. During the lessons we do keep a distance and make sure we work according the guidelines as set out by the government. If people are interested in On-line lessons, that can be arrange too, just let me know.

Most of the lessons are for one hour, but they can be longer or shorter, all depending on what you would want.
If you are not sure yet about what to do, you can have a introductory lesson. This will give you an idea of what it takes to learn to play a musical instrument.
It is best to bring your own musical instrument along, if you do not have one we can make a arrangement for you in order to use one.


Some of you may have thought about taking up a musical instrument, but are not sure about what to buy at the moment. Feel free to contact me. I can give you advise and pointers as in what to look for and what to buy.

Over the next few weeks I hope to put out more videos, some of those will be just music, some of them will be tutorial videos with ideas and suggestions for particular playing techniques.

For all of you interested in music and learning to play a musical instrument, keep checking out this site for any more updates.

Hope to catch you soon again.
Eddie

Banjo Lesson: Combine Melodic Style with Forward, Reverse and Alternating Roll


This lesson does contain two basic, different ideas .
The first idea is made up of a G and G7 chord over two bars which are being repeated. Both bars consist of the forward- and reverse roll combined with the Pinch and a Melodic idea:


D ———–0——————-3——- ————0———–3—2—-0——–
B ——0——————–0———— ——–0——0———————0—-
G –0——0——-0———-0——- —0——-0———-0——————-
D —————————————– ———————————————
G —————————————– ———————————————–


N,B: Notice Pinch contains melody and melodic run-down at end.


The second idea contains 4 bars made up of the alternating roll, which is played by alternating G (5th) string with the D (4th) string while sticking the G (3rd) string in between . The Melodic ideas are all played on the D (4th) string:


D ————————————————– ———————————————
B ————————————————– ———————————————
G ————0————0——–0—–0——- ——–0——–0———————-0–
D ——————–0—————–0———– ————-0—————3—2–0—–
G —0————————-0——————— —0—————————————-


D —————————————————- ———————————————
B —————————————————- ———————————————-
G ————0———–0——–0——0——– ——–0——0—————————-
D ——————0——————-0———– ————-0—————-3——-5—-
G —0————————-0——————– —-0—————————————-


N.B: Observe all 4 bars are made up of similar alternating roll which changes towards end of 2nd and 4th bar.


Check out video at bottom of this article where I play these two basic ideas combined with more melodic, improvised ideas.

Hope you like this simple Banjo lesson, there will be more articles related to the Banjo in the near future, just keep checking the blog from time to time..
or subscribe to the channel to keep yourself updated! Please do not forget to like and share the video. Cheers!!

Thanks and hope to see you again soon!
Eddie


Eddie de Hamer Now Available for Banjo Lessons in Leeds

I can offer Banjo lessons to a high standard of playing.
Anyone who wants to learn to play the Banjo is welcome, I can help you with the styles of Blue Grass, Old Time or you may simply want to learn the Banjo for your own playing style. Is is all possible, simply get in touch through the contact page on this site to let me know about your interests and we can take it from there.

Banjos come in a variety of instruments. The most common one you will find today is the 5-string Banjo, but there is also a 4-string Banjo, called the Tenor. Then there is the Long-Scale Banjo, which was popularised by Pete Seeger in the 1960s.
Whatever Banjo you want to learn, I can help you to improve your playing style. just get in touch!

Guitar Players who want to give the Banjo a try may find it relatively straight forward, since the Banjo tuning is not too different from the Guitar Tuning: High E is tuned down to a D. The B, G and D string remain the same! The low A is tuned down to a G.
The tuning you end up with is a G chord: The Banjo is tuned to a open G!

The string configuration is a bit different to a guitar: The first four strings go up in gauge, the 5th string, which on the guitar would be just below your low E, is of a similar gauge as the 1st string. It is often used as a drone string, although this may depend on what you actually play!

Thinking about the playing technique: The Banjo is often picked. The picking patterns are called “Rolls”: They are basically a set way of picking the string in a particular order. There are a handful of popular Rolls which are used regularly. Any guitar player who does use Finger Picking Style will be able to get the hang of these rolls quickly!

The Banjo is not often strummed, but you can strum it, just like a guitar. The instrument does not sound as loud as when it is being picked.

As far as the tuning: The D,B,G,D,G (high to low) goes, this is the regular five string Banjo tuning, but other tunings will work as well. It is just a case of experimenting with what you like.

Here is a brief video where I use a variety of techniques to get a very short piece across:

I will create more videos where I will demo particular Banjo techniques.
If you enjoyed this video, why not subscribe to the channel? Please do not forget to like and share the video. Cheers!!
There will also be more articles here about Banjos and their playing style.
Thanks and hope to see you soon again,
Eddie

A Introduction to Loop-and Delay Pedals with Hold Function

For this article a brief outline about loop pedals. It will include what they do, the various functions you can find on them and their history.

What are Loop Pedals?:
A loop pedal is a simple device which lets you record and playback a musical idea.

What Can Loop Pedals Do?
A basic loop pedal will let you record your guitar. You can then play back this recording and add other parts to augment your previous made recording. There may be a control to balance the overall sound of your loop.

More advanced looper pedals will offer you more functions: You may find a start/stop function which will let you bring in your loop any time you want it. You may only want to have your loop in one part of a song you play. The loop may work as a extra part. All you need to do is start your loop at the time you want it to come in, and stop it where you want to end it.

There may be a function which will let you set the rhythm of your loop.

Some loop pedals come with a Automatic Start function, this function will let you start recording a soon as you start playing a note.

Your loop pedal may have a Save function, which will let you preserve the loop you have just created for any future moment when you want to use it.

There are loop pedals which come with pre sets for either/or rhythm tracks of drums or backing tracks of various musical styles. This may be ideal for guitarists who like to work with generic pre recorded musical ideas instead of creating their own, individual musical ideas.

You may come across loop pedals which do have a dedicated XLR input for a microphone. In this case you will be able to use your voice alongside your guitar signal.

History:
The earliest, and most basic form of loop pedals are delay pedals with a hold function. The first pedals of this kind started to emerge in the early 1980s.
The hold function on most of these pedals is very short. They may contain just enough time for you to hold one chord, certainly not enough time for looping a whole sequence of chords. Overdub functions did not exist: You simply record over your previous recorded sound. This recording technique is called “Sound-on-Sound”: Each time your record over your original recording, the quality of original will get weaker. As one can imagine, there is a limit to how many times you can record over your original idea, since the original recording will disappear as too many parts are recorded over it. Sound-on Sound is a valid and useful technique but requires some planning and a little experience as to how many parts you can record over your original idea.
As the 1980s progressed delay pedals started to have longer delay-and hold times. Some of them did have a hold time for a full two seconds, which is good enough for 1.5 bar of music in 4/4
The overdub function was still often Sound-on-Sound with the result of loss in quality for your loop once you started overdubbing.
Towards the end of the late 1990s and early 2000 we see the emergence of dedicated loop pedals. Newer, better digital technology meant longer loop times and overdubbing without the loss of any quality for your original recording.
Today you can find any kind of looper pedal you may want. All have their own dedicated purpose and function.
When you are new to looping you may want to start your journey into looping with a basic delay pedal with a hold function: It will teach you the technique how to set up your basic loop. True, a basic pedal will be more primitive compared to a more advanced, dedicated loop station pedal, but it is also more fun. You will learn quickly how to set up creative loops. In the meantime you will see its strengths and weaknesses. Once you upgrade to a better loop station your learning curve will be short since you already have mastered your basic loop skills. You will enjoy your time with your new looper straight away instead of being frustrated over not being able to create smooth loops for your music.

Here two videos I have made for loop pedals: One is with the Boss Delay DD7, this pedal is a delay pedal with a hold function for 40 seconds, no save or stop/start functions. The loop will repeat itself as soon as you finished recording. In the video I do mute the sound of the loop by turning down its volume with a volume pedal. The DD7 will allow you to turn down the volume of your loop by using the level control. The volume will be turned down, but this will not stop the loop. The loop will keep playing until you erase its content!

The next video here where I used to Boss RC-2, which is a dedicated loop station which contains 16 minutes of recording time for creating loops. It also contains various drum guides which you can use along side your loop. You can hear me using a drum guide on the actual loop. The RC-2 does also come with a Save and Stop/Start function. Most dedicated Loop Station pedals will have these functions.

The PDS series from Digitech are one of those pedals which use” Sound-on-Sound” for their Looping-and Sample Function. On this particular model you can stop your loop, but you cannot save it.

Hope you found this article useful and enjoyable.
If you enjoyed the article and videos, why not subscribe to the channel? Please do not forget to like and share the videos. Cheers!!
Looking forward to see you again here in the future.
Thanks,
Eddie